


Under Construction
Greenhouse 4
Building the walls
For me, this is the really difficult part. Though it seems straightforward, I think bricklaying is rather difficult. I remember Yosser in Boys from the Black Stuff not doing too well building a wall and I reckon that has dented my confidence with regard to brick laying ever since! But I’ve go to get over that!
One of my main concerns is the fear that I’m going to get the wall slightly the wrong size to fit the woodwork. If I were building the whole thing from scratch, I would just make the woodwork fit the wall but, unfortunately, that’s not the case. Also, it’s quite difficult to control a brick on a bed of soft mortar when it has the ability to yaw, pitch roll etc.
Obviously, it is very important to get the foundations and the courses of bricks level. As I mentioned before, the optical level allows points which are quite far apart, set to the same level (to the nearest mm). This would be difficult using a spirit level working through a number of intermediate points or stages, as inaccuracies would inevitably build up.
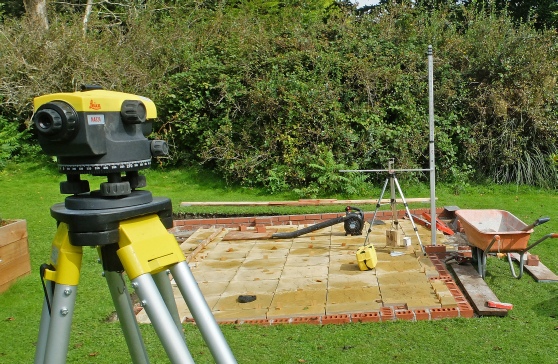
Setting up the optical level is easy. Just set up the tripod somewhere where you can see all the points on the site you want to level or measure. Press the feet into the soil or turf to get a solid set up. I use a spirit level on the top of the tripod to get it closely level. Adjust the tripod legs with the spirit level in two positions on the top of the tripod at right angles to each other. Then screw on the level itself and fiddle with the three levelling screws to get the bubble on the built in spirit level in the centre of the circle. The thing then makes its own final adjustment by means of magic pendulums, or something like that, within its body.
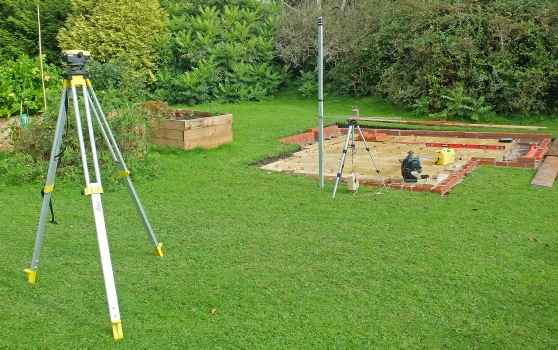
The staff (which is like a telescopic ruler) is placed on my reference peg (known as a datum) and using the telescope, the reading on the staff is determined. My datum corresponds to the level of the foundations and is recessed into a small hole in the grass. This means I won’t kick it and change the height but I may trip over the hole (but I’m more likely to trip on one of the many rabbit holes!)
(I eventually noticed that you can separate the various sections of the staff. This makes it much lighter and easier to support with a lash up arrangement. Also you can remove the un-
Back to some low level levelling! The staff is placed on the first point to be levelled, (for example, the first corner brick of a new course of bricks) and the measurement on the staff determined. By taking the first measurement from the second you can determine the absolute height of the course above the datum. This means if you have to move the optical level you can set a level just by measuring the height of the datum and adding the previous measurement. In practice, I don’t find I have to do this as I either set all the levels in one go, or there is a brick which I can use to measure from.
(However, the datum will also be handy when I level the site in front of the greenhouse ready for a small patio at the same height as the floor in the greenhouse. I’ll do this when the greenhouse is finished.)
Some years ago I happened to be aimlessly flicking through channels on Sky (!) and on a shopping channel saw an advert for Bricky from Marshall Tools and I sent away for one (this is the only time I have ever done such a thing, honest). It's a sort of jig for applying a bed of mortar in bricklaying together with a few other odds and ends. I tried the jig for the first time on the greenhouse build. The tool produces a bed 10 mm deep which doesn't seem thick enough as you need to press bricks down on the bed (tapping with the handle of a hammer or trowel) to get proper adhesion so you will end up with a bed less than 10 mm. (Of course, there is nothing to stop you raising the bed above the jig instead of striking the mortar level with the edge of the jig but this requires judgement and skill which is what I am trying to avoid!)
Also, with perforated bricks like the engineering bricks I am using for the lower courses, quite a bit of the mortar disappears up the perforations (which is good for strength) and reduces the thickness of the bed rather quickly. Although this aids levelling you can keep on hitting the brick till almost all the mortar dissappears up the perforations (which would not be good for adhesion) With solid bricks, I find that you reach a limit if you are trying to reduce the thickness of the bed by hammering at the brick as the water is driven out and the mortar then becomes compacted and no longer flows.
Back to Bricky, another problem was the tool was too long to get into some parts of my wall with short runs between piers etc. However, some of the kit is useful such as the jig to butter the end of a brick and the things enabling a builder's line to be very easily hooked up (this “line block” is known as the “Mason’s Mate” and you can set it up without having a second person to hold the line in place as is required with some other types).
In actual fact it is very easy to make a jig like the Bricky out of two strips of wood with a rebate screwed together with one or two pieces of ply. Using this method you can make a jig of any reasonable length and to produce any depth of mortar bed.
I have found a jig like this is useful for a person like me who has not had years of practice and without it I find I am laying inconsistent mortar beds and I spend an inordinate time tapping away at each brick until it inevitably gets too low and then it's a case of starting all over again with fresh mortar!
(Note that all these jigs need to rest on the edges of the bricks below the new bed of mortar and if you want the mortar to reach the edge of the brick, you have to rely on some of it getting squeezed as you bed the brick in.)
One further point about the mortar. I have found it all too easy to let mixture in the barrow thicken up with time(see above). Then it becomes impossible to level the bricks (especially the non-
Laying the bricks and not using a “Bricky”!
Levels
Mortar
I've had a small Belle cement mixer for about 20 years but until now it hasn't seen all that much use. When mixing up concrete, it will take three buckets of aggregate but sometimes the drive belt slips when you turn out the mixture in the wheel barrow and it needs a bit of encouragement with my hand. (The belt is already as tight as it can be -
When mixing mortar for bricklaying, I am so slow laying the bricks that I don't mix up more than one bucket at a time therefore, there is no strain on the machine. I use 5 parts of soft sand to one part Portland cement and one part of hydrated lime. To get the right consistency, I have found it takes round about one part of water. (I use a plastic white spirit container cut down to give a volume of 1/5 of my bucket. The amount of water needed varies according to how damp the sand is. The sand in the bottom of a large bag can be very wet after it’s rained compared to that in a full bag to the extent that half a part of added water can be too much. Also, I wonder if damp sand can prevent the constituents mixing properly so dry sand is probably best.
Add the sand, start the mixer then add the cement and lime. Stand upwind of the mixer if you don’t want a lung full of dust! Add about half the water and allow it to be absorbed. (Adding the water in two stages makes the mortar less likely to stick to the mixer drum.) Then add about three quarters of the remaining water and assess the consistency. Add more if required. You can always add more but taking water out is difficult! You can tell the consistency is about right when the mix starts to slump down from the top of the drum as it loses adhesion to the drum in one lump and with a satisfying plop. The consistency is also about right when a slice of mortar will adhere upside down to the trowel. After a few minutes the mixture will be less sloppy, so this needs to be borne in mind.
The mixture gets less plastic with time and need turning over in the barrow with a shovel and water added to maintain a consistency which is easy to work with. I’m not sure for how long the mix can be revived in this way without losing strength but specifications I have seen say that after two hours unused mortar should be discarded. It does seem that after a bit, you have to revive the mix on a more and more regular basis to prevent it setting. My project is pretty undemanding with regard to the strength of the brickwork, of course. Certainly mortar that has been revived or re-
In the past bricks were laid with lime mortar which seems to me to have not much strength or adhesive power and which just stopped the bricks slipping around while gravity held the building up. So slightly weakened cement mortar will probably not be a problem for my garden projects. Building a house would, no doubt, be a different matter subject to BS standards informed by years of study by the Building Research Establishment and under the scrutiny of the building inspector.
Ten years or so with being involved with stone restoration at The Royal Pavilion taught me dangers of using mortar which was too strong for the material, in this case Bath stone (soft enough to carve with wood tools). When the joint fails, it takes some of the stone with it. I believe this is a principle to be born in mind with any adhesive in any application. I assume my 1:1:5 mix is not too strong for my stock bricks.
Anyway, back to more practical matters. Immediately after turning out the mortar from the mixer, I load a shovel of ballast and spray the inside with a hose jet. After a couple of minutes I turn this out leaving the mixer pretty clean. (More mess to be disposed of, however!)
The tripod is a support to hold up the staff (my wife is much too busy to hold it for me!)
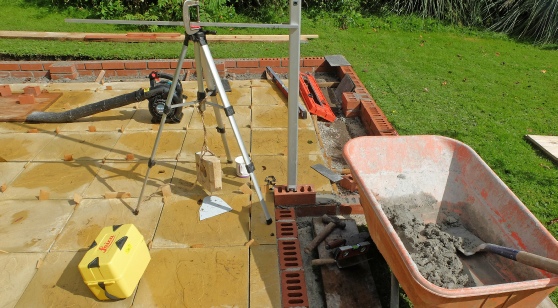
The orange thing in the background is a “Bricky” which I have rather quickly discarded (see below). Also spot the leaf blower needed to blow away rainwater. This has been the wettest September/October in my living memory! This seems to be a bit of a nuisance with perforated bricks. If I have mortar left over, I have filled the perforations but left dents (made with the point of the trowel) to aid the bonding of the next course.
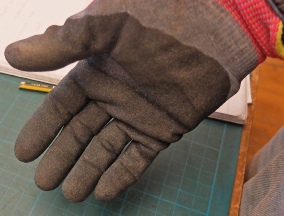
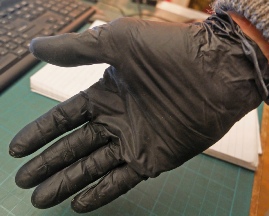
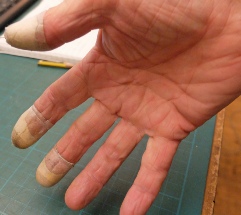
Some safety gear
These neoprene-
This is painful and requires plasters and a lot of sympathy (if you can get it).
The answer is disposable nitrile gloves under the neoprene gloves. (You can’t have breathable and water proof at the same time, sadly!)