


Under Construction
Greenhouse 5
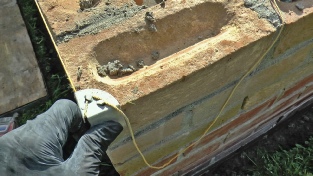
There are some tools that seem to be essential such as a leaf blower to blow out rain water collected in the perforations of the engineering bricks as mentioned previously.
With its piers and small dimensions between corners this job needs a lot of cut bricks. Although bricks can be trimmed with a bolster chisel and club hammer, a largish disc cutter is a lot quicker. We accidentally bought our cutter in France at Brico Dépôt (which is a chain of DIY shops owned by the same people who own B&Q and Screwfix). It looked too cheap to ignore but due to a failure to appreciate the subtleties of the French language when we got to the checkout we found the price we had been looking at was just for the diamond disc! Nevertheless, it is invaluable. For example, cutting a paving slab into an “L” shape with a chisel is mighty difficult.
More tools
More Levels
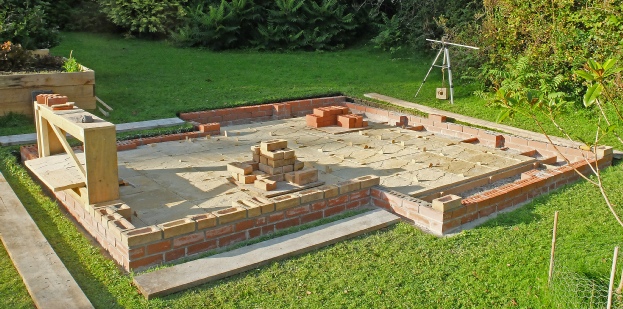
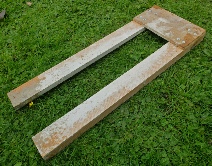
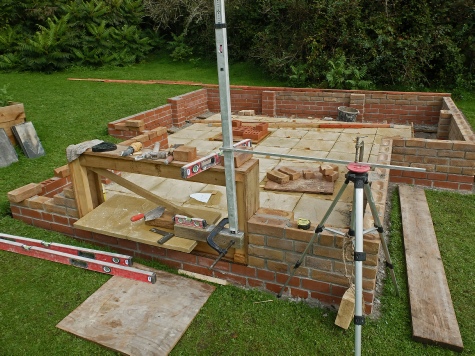
I am particularly concerned with getting the opening for doorway to the correct dimensions, square, level and in the correct position in the wall as otherwise, when the company comes with the woodwork, it won’t fit! To this end, I have made a frame which is the same size as the bottom half of the door frame. I have taken a lot of time to get it square and also marked out the positions of the brick courses, allowing 10 mm of mortar per course, so that the top of the brickwork is as specified in the plan (later on I found I had made a slight miscalculation, the beds needed to be about 12 mm which required the last two beds to be about 13 mm. I’m sure the mortar thickness has an affect on the strength of the wall as well as an aesthetic affect but, again, it is not so critical here.
For each new course of bricks, I clamp a block of wood against the frame with the top level with the mark. I then measure its height with the optical level and set up bricks on the corners of the building, checking the height of each to match the mark on the frame. Using these as references, I should keep the course level.
First brick set to mark on frame

Reference bricks set to the same level
Frame, same dimensions as door frame -

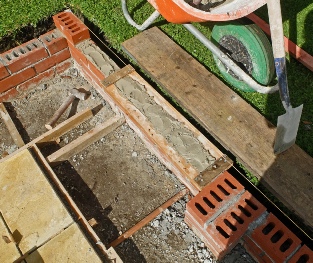
Homemade “Bricky” substitute to guide laying the mortar bed.
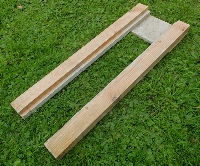
A slightly shorter version of the homemade “Bricky”. The rebate is half an inch deep. This is better at getting into tight spaces. Also the sides can flex a bit to accommodate slightly irregular bricks.
Piers
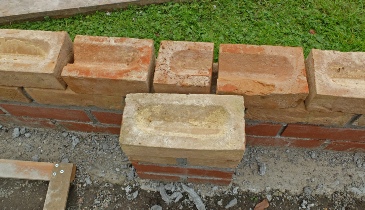
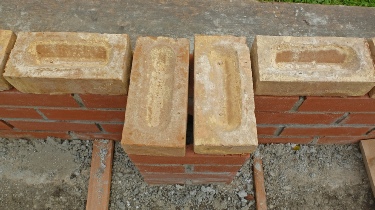
This is how a pier in the middle of a wall is laid out…
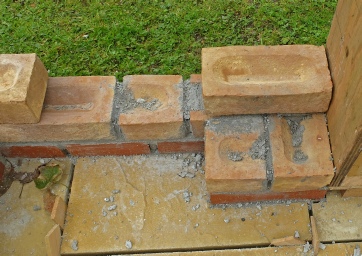
and here, a pier at the end of a wall (at the doorway).
Half brick
Three quarter-
Half brick.


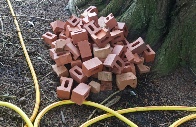
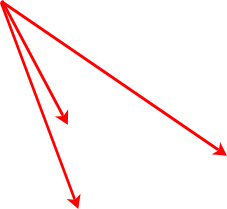
As mentioned, with piers and the corners, there are a lot of cut bricks. This is the pile of waste after only three courses of bricks.
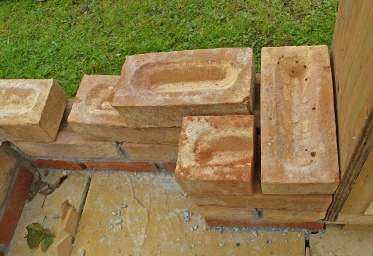
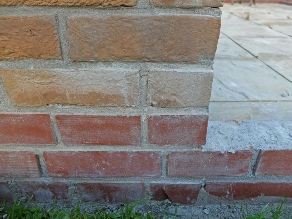
The buff with a slight pink tinge bricks which I am using above the engineering bricks are, I think, seconds and are Ibstock “sand creased”. They are irregular (some more than others) and are facing bricks so they are frost resistant but they certainly soak up water, usually, with a big hiss! They need to be dipped in a bucket for a couple of minutes or more before laying and the previous course needs to be well soaked with a big wallpaper brush or similar. Fill the frogs with water but wait till it soaks in before laying the mortar. It also pays to get on with levelling the bricks ASAP as the mortar loses its plasticity quite quickly as surplus water is soaked up if you’re not careful. (See previous note about keeping the mortar plastic).
The stock bricks have a face designed to show (it’s got all the creases). The engineering bricks similarly have a smooth face and a textured face. I have set the bricks so that their best side shows on the outside of the walls (except for one or two mistakes!)
I still have worries! Should I have built a one brick instead of a half brick wall? Will the foundations be sufficient? Will the final dimensions be accurate enough for the woodwork? Well I expect it will all turn out ok, fingers crossed.
Another worry is the time it is taking. I hope I can crank up to 40 bricks a day with practice but there is always so much other stuff which gets in the way of laying bricks. For example getting all the equipment out, cleaning and putting it away. Transporting materials to the site, mixing cement, cutting bricks, greeting the cat when he comes to inspect the work, having lunch, coffee and tea breaks etc!
Anyway, the buff bricks are well under way and the last engineering brick has been laid (unless I decide to make the final course engineering bricks because of their better adhesion and regularity -
As mentioned, the buff bricks are irregular and so some judgement is needed as to which part of the brick should conform to the string line or the spirit level. However, because of the irregularities, errors don’t show up so much! If I make the top course engineering bricks, that will let me get the dimensions spot on, hopefully.
(PS In the end the bloke from Swallow said the piers were nice but not necessary. However, they do add strength and a bit or character and they force the break up of the rather boring stretcher bond you get with aingle skin of bricks.)
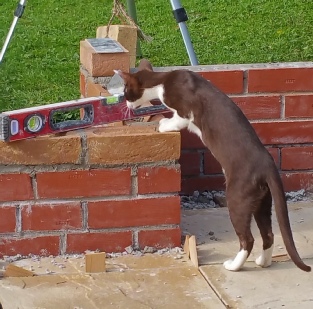
Cat likes to check my work!
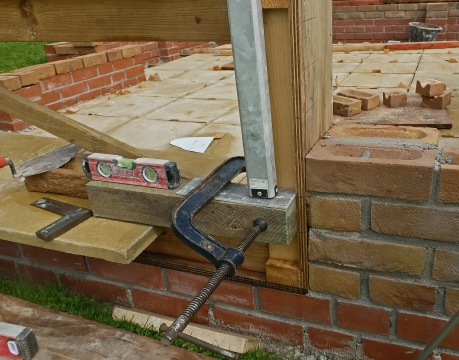
Courses marked out on side of frame.
Block of wood clamped to frame level with mark.
Aluminium sheet needed on bricks to bridge over the frog.


First I set two end bricks level as described above. Then I set a middle brick using a long spirit level to match this to the end bricks. I also check the level of these three bricks individually along the length and width of the brick and also make sure they are positioned to keep the wall vertical. I then use my Bricky substitute to lay a bed of mortar between these bricks. This gives a bed of about 12.5 mm which allows for a bit of bedding in to reach the nominal 10 mm bed. To do this, I squish the mortar to the side of the barrow with a succession of slicing motions with my small spade (you can’t do this too often!) I then squash it down with a trowel and cut a sausage of mortar with the trowel and slap it down onto the bricks with as much of a professional looking flourish as I can muster. I use a gauging trowel for this as not being used to bricklaying, a full sized bricklayer’s trowel might strain my wrist! (Also, I find the rounded end of the gauging trowel more convenient for this job.)
Next I use the Mason’s Mate thingamabob to stretch a line between the outer bricks. Then I lay the remaining bricks. I “butter” one end of a brick (using the Bricky) and place it on the bed with a tap with the handle of a hammer downwards then sideways to bed the brick up to the previous brick. If the mortar drops off the end of the brick, the mortar is too dry. I then check the level across the brick and adjust with (a few hopefully, if I’ve done a good job laying the mortar) small taps with the handle of a trowel. I then tap the brick until it is level with the others using a straight edge or level to test it. It’s reasonably easy to check if the brick is too high as the straight edge will rock. A millimetre or two too low is better than to be too high. I cut off any mortar squashed out of the joints with a pointing trowel held against the side of the brick. Lastly I tap the brick sideways to get it as close as possible to the string line.
When tapping the bricks to bed them or move them, it seems helpful to press down on the brick with the non-
The last brick in a section will need mortar introduced into the gap. This is best done by cutting a slice of mortar thin enough to slide down the gap and compacting it down with the edge of the trowel. A finger can stop the mortar spilling out sideways. While the mortar is still plastic, you should compact the joints by running the tip of the pointing trowel along. Some additional mortar will be needed to fill missing bits in the joints. You could scoop up some mortar from the barrow on a pointing trowel and squeeze it in or like me, you could use a combination of trowel and fingers. I’m sure that is not at all professional!
After three or four hours, when the mortar has reached an initial set, I clean out the joints with another tool from Bricky which conveniently has a number of different widths to suit the range of joint widths which inevitably arise. Vertical joints will range from 6.5 to 12.5 mm. A bloke on a video said don’t be too fussy about getting these joints all equal so I’m not! I use a slightly damp coarse floor cloth to clean any mortar off the bricks and soften the pointing as that seems to suit the rough old bricks I’m using. I think proper pointing can involve, at the end of the session, scraping out mortar from the joints to a consistent depth, inserting fresh mortar and shaping it to the style of pointing required (flush, weather struck, recessed) with an appropriate tool. (See the next page for more bricklaying pictures, step by step.)
Laying the bricks
As I am only building a half brick wall (the width of the wall is the width of a brick) I need to incorporate piers to give the wall stability. This is how they are fitted into the wall.

Small spade, useful for turning over the mortar in the barrow.

“Mason’s Mate” anchors line

Next: brickwork in pictures and edging the slabs
Bonding
Bricks should be laid so the vertical joints don’t line up with the joints in the courses above and below for obvious reasons of strength. With a single thickness wall, the ideal is full bricks with the joints in one course lined up to the middle of the bricks above and below (stretcher bond). Wall length and piers etc mean that cut bricks have to be used but joints should never line up between courses.
Goodness knows how this happened!


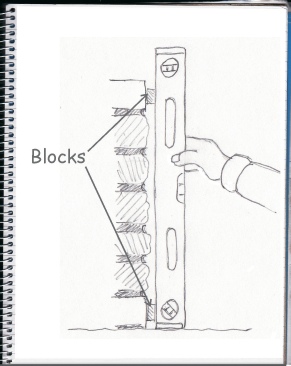
It’s obviously important to keep the wall vertical because if it isn’t it’ll look awful and the dimensions of the top won’t match those of the bottom. So when planting the corner bricks, it’s important to keep checking with the spirit level. With the stock bricks, their irregularity makes things difficult. Using a couple of blocks with the spirit level as shown on the right may help.
Keeping it vertical
Keeping the bricks in line
Helping to lay an even mortar bed