


 Home
Home

Under construction
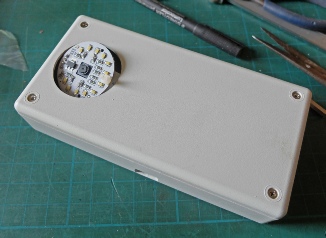
RaspberryPi security camera
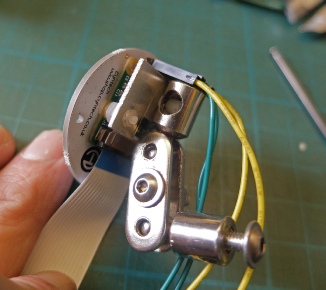
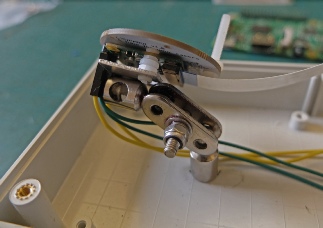
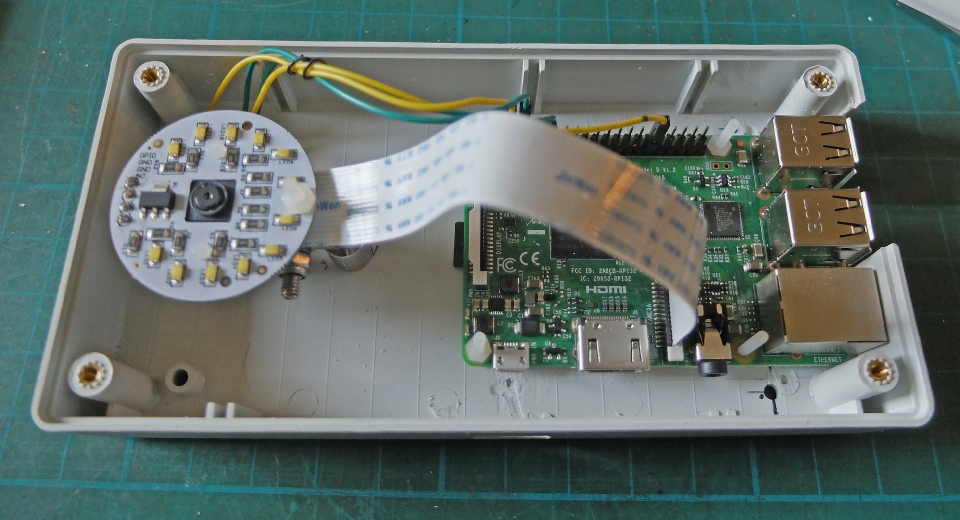
I used a part of an old “helping hands” assembly to articulate the camera in the case. The camera and lighting unit bolt together with M2 nylon screws. There is one nut as a spacer between the camera and the light unit. The combination of camera and lighting unit are fixed using the same screws to a piece of 20 gauge aluminium. Four M2.5 nylon nuts act as spacers here. The aluminium,, in turn is fixed to the “helping hands” ball joint by means of an M4 nylon screw which used the hole in the ball joint assembly which originally took a locking thumb screw.
The second ball joint in the assembly originally had a plastic magnifying glass fixed in a socket. I discarded the magnifying glass and found a piece of brass tube which was a tight fit in the socket. I tapped this to M4 thread and bolted the assembly to the box.
To make a fairly slim line case, I laid out the camera and light unit and the RaspberryPi side by side.
I used a Hammond ABS box (1559 EGY -
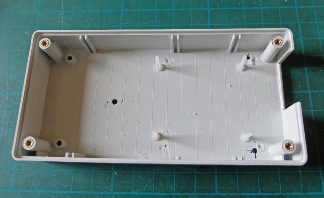
A couple of internal bits of case needed to be removed. This is best done with a sharp chisel. I made the hole for the camera with a tank cutter bit and brace.

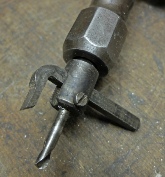
Typical set of “helping hands”
Next, the software to run it…
The completed unit (for now). There might be a number of opportunities for expansion.
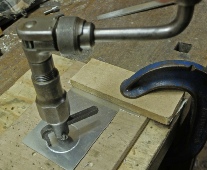

Clamp the lid to a piece of scrap wood and the bench. Drill a pilot hole through the lid and into the scrap wood. The tank cutter can be adjusted to any radius of hole within its range. Make sure the cutter is sharp. Keep the brace vertical and use gentle downward pressure to avoid tearing the plastic. Cut half way through then turn the plastic over and finish the cut.