 Home
Home

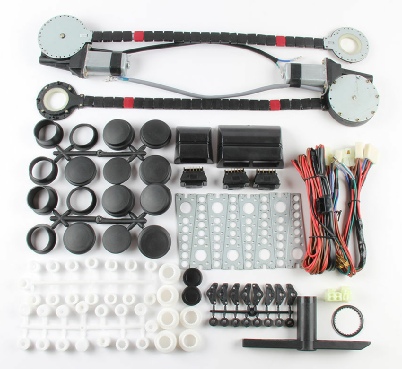
The window motor kit
I used a generic kit to power the windows on my TR7 (about £56 on Ebay see left). The motors looked a bit small and I worried that they wouldn’t be powerful enough. To my surprise they were a bit too powerful and too fast. Part of the mechanism stripped when the window jammed against the hood which I hadn’t put up correctly. Also without limit switches the same might happen at the top of the window’s travel if the switches were not operated with care. I wanted to slow the motors and add current sensing to turn off the motor if the mechanism jammed in any way.
A block diagram of my system is shown below:

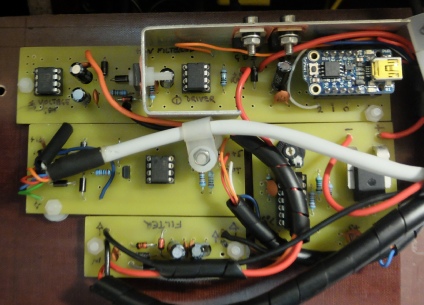
The circuit(s) I’m going to describe is(are) shown left. As I mention later, for this prototype I’ve made it up on four PCBs (so I could more easily modify it if needs be). If it were on one PCB it could be made quite a bit more compact.


The original window control involved two up/down/off switches operating a couple of single pole, double throw relays. I could have used just switches but it’s best to use relays (or mosfets) in most car applications to ensure that the current carrying capacity is adequate. Also, if the relay fails it’s a standard item which can easily be replaced (as long as you can get at it!) but a switch of the right style to match the original might be hard to find. The circuit which uses the relays to provide an off and current reversal for up and down is shown below.
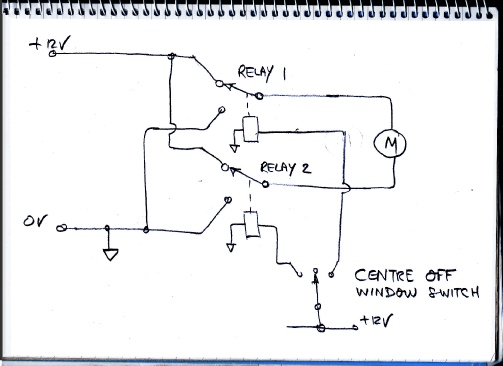
In my new system, I decided (mainly out of laziness!) to keep the relays and supply pulse width modulated power to them and thence to the motors. I could have dispensed with the relays and used mosfets arranged in a couple of H-
Circuits for the system
The circuits corresponding to the blocks in the diagram above were in the main developed separately, tested on a bread board and built on separate PCBs so that if one bit didn’t work properly I could just replace that part of the project.
The details of the first circuit are shown next:
Electric windows By Adafruit Trinket
