Home
Home


Completing the cover
The centre needs to be cut out first. Could be done with a multi-
Next some studs need to be glassed on so the top can be screwed to the aluminium base. There is no necessity, by the way, for this joint to be absolutely air-
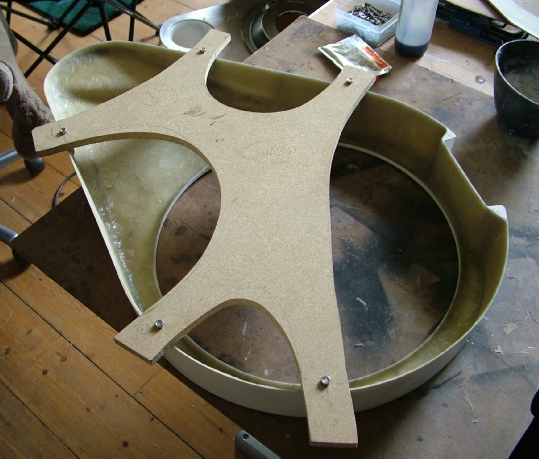
I spaced five fixing points round the cover. The positions are chosen to be getatable which is why they are not evenly spaced.
I made a former out of MDF to hold the M5 studs in place leaving cutouts in the MDF so I would have access to fix the studs in place which I did with a generous dollop of epoxy.
When that had set, I could carefully remove the MDF former. I then applied a little filler either side of the stud and when that had set and been smoothed, I applied small strips of glass fibre and resin to hold them permanently in place. The filler made it easier to apply the glass fibre as it meant it didn’t have to bend too much when the resin was applied. (See below.)
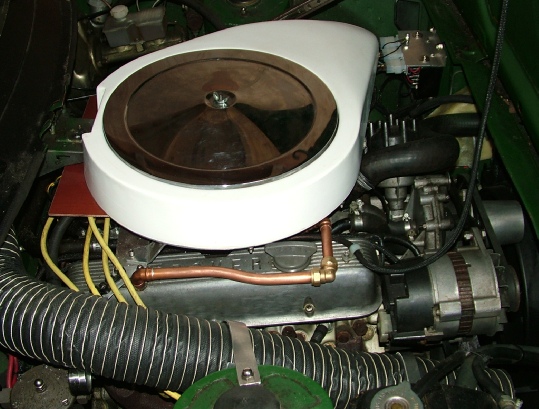
Heater inlet duct
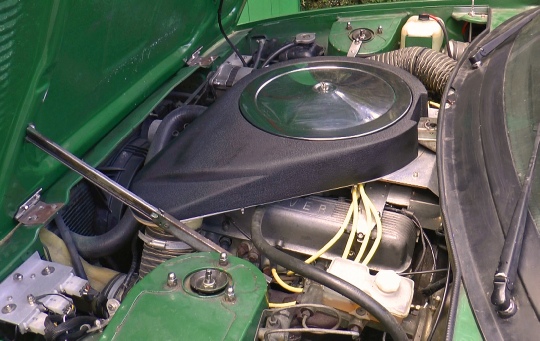
Black crackle finish
Once that had set I trial fitted the cover on the base plate and secured it with M5 nyloc nuts. I avoid tightening these too much as the studs could be torn out of the GRP.
Finally, I sprayed the cover with black crackle paint. This needs to be baked to achieve the crackle effect but it can be done with a hot air gun. Keep the gun moving to avoid a patch developing before another adjacent part which will show up. Also a hot air stripper like I used is very hot so if you are using one of these be careful not to overheat the paint. As noted below, I had to repeat this process later because of rubbing between the bonnet and the cover.
Without very careful checks on a rolling road it would be difficult to say for sure whether this project has had any effect but the theory says it should and I am going with that!
Since I installed the cold air system, I changed the bonnet from steel to GRP. One reason for this was that although the louvres look fast, I didn’t like the idea of water pouring ito the engine compartment when it rained. The GRP comes with louvres moulded in but not cut. (For similar reasons I didn’t cut the heater intake grill and fitted up ducting to draw fresh air from the front of the car). Anyway, the clearance to the cold air cover, always tiny, has now disappeared and some rubbing is taking place. I shall have to get round to reducing some of the GRP bonnet inner skin.
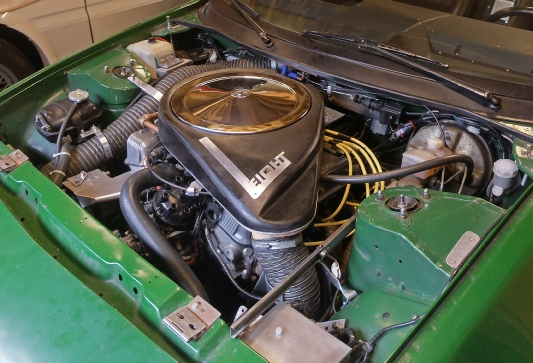
There is plenty of room in the engine bay for the V8 except in terms of height where problems can arise. (Also tubular exhaust manifolds can be a bit close to the box sections at the base of the engine bay.)

After a bit of cutting to the inner frame of the bonnet and some re-
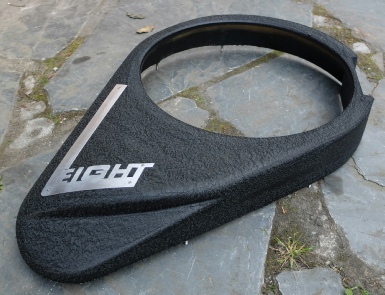
Later, I cut a badge out of 1.5mm aluminium and fitted it to the cover with M2.5 countersunk screws. (If nothing else, this will protect the paint from any slight rubbing which may occur!)


Finally, I re-
I let the paint dry overnight then applied a hot air gun, keeping it moving rapidly to avoid overheating, until the wrinkles had bee fully developed.
Perfection over a large, 3-
Temporary black paint