

 Home
Home

Under construction
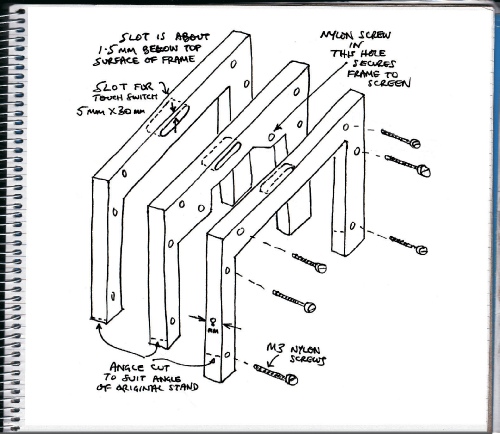
Perspex frame for Raspberry Pi screen

The “feh” screen saver / picture slide show on the Raspberry Pi needs Esc to be pressed on the keyboard for the program to quit. If there is no keyboard this presents a problem. There may be an easy way round this but if there is, unfortunately, I don’t know what it is!
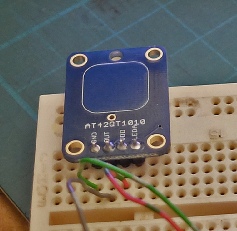
As described on the last page, a micro controller such as the Adafruit Trinket can be programmed to simulate a USB keyboard and it seemed to me that, given how small and cheap the Trinket is that might be the best solution to my problem. A neat way to trigger this would be by means of a capacitative touch/proximity switch such as the Adafruit unit shown left. This could be concealed within a perspex frame which would also hide some of the Pi’s electronics.
I decided to make the frame from a stack of three layers of transparent Perspex. With a laser cutter the whole operation would take minutes, however, using a band saw, router, files, abrasive paper, drills, polishing wheel etc. is much slower and took me the best part of a couple of days. Also using, say, black Perspex would have meant that I could have got away with not polishing the inner surfaces, however, I happened to have transparent Perspex to hand so that’s what I used!
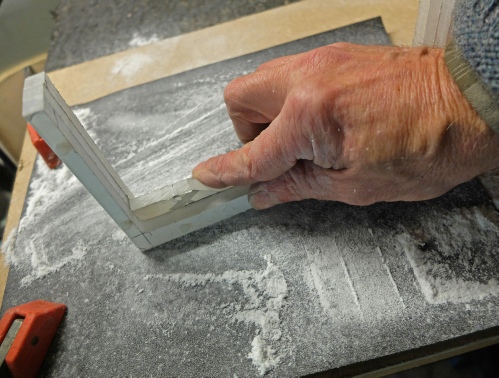
Smoothing mostly involves rubbing the raw surfaces on 100 grit wet or dry followed by 240 grit.
It is possible to use a woodworking plane on Perspex. It need to be sharp and set for a very fine cut. Plane from both ends towards the middle otherwise the corners will be cracked off.
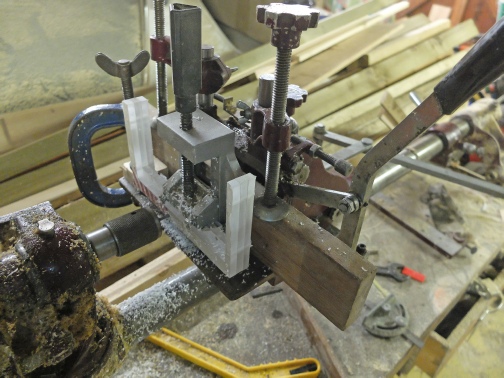
I cut the slots using a slot mortising attachment on my woodworking machine. It should also be possible to use a router with some fiddling about with suitable guides and stops or a machine fret saw. Perhaps the best alternative is to drill touching holes, then perhaps cut between them with an Abrafile blade in a coping saw frame finishing with 100 grit paper wrapped round a strip of metal.
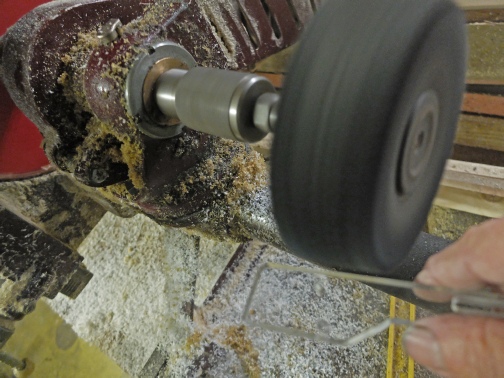
The edges can be polished with a soft buffing wheel dressed with brown compound (which, I think, is what used be known as “Tripoli”). Using the wheel requires a strong grip on the part being polised and work below the centre line of the wheel to avoid corners catching and being thrown off. (Use eye protection!)
Tripoli is quite abrasive and will rapidly round off sharp edges. Sometimes, of course, this is what you want.
It is possible to polish Perspex by hand using Solvol Autosol on a soft cloth.
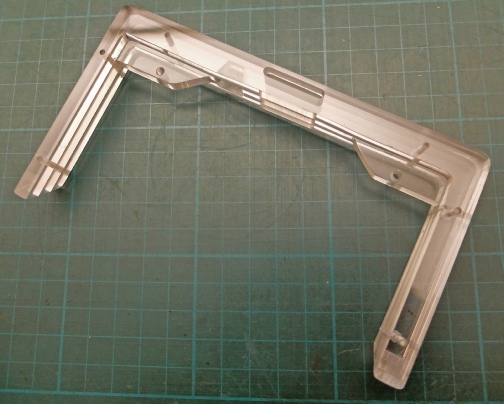
This is what the finished frame looked like. The holes in the front layer had M3 thread tapped into them and I used nylon screws to fix the bits together. You could gle the parts together (with Tensol solvent cement) but I prefer to be able to separate the parts in case I want (or need) to do any modifications.
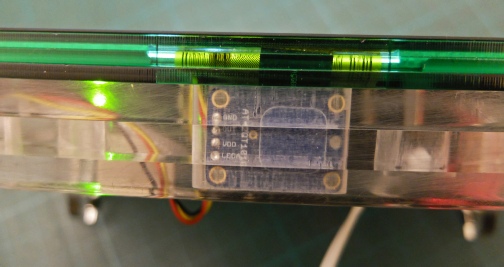
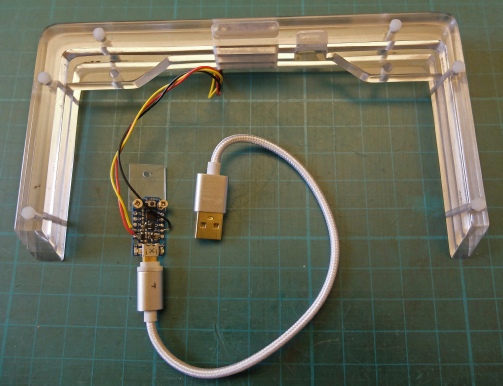
Here the touch switch is in its slot and the three wires needed are soldered into place. The switch gets its 5 volts from the USB pin on the Trinket and the switch uses port 0. The final connection is ground.
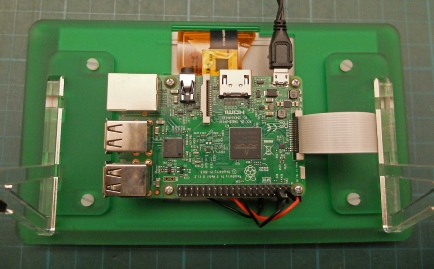
I have secured the Trinket to a thin piece of Perspex which is, in turn, tied down by one of the screws which secure the frame to the Pi’s screen (again M 3).
Here, everything is in place.
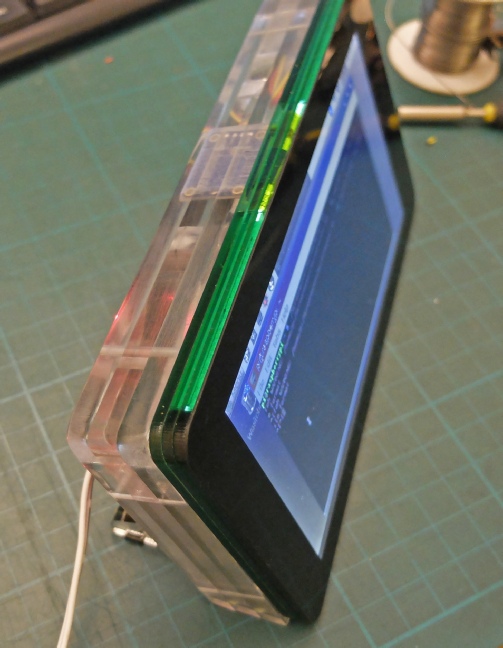
This top view shows the touch switch through the Prespex.
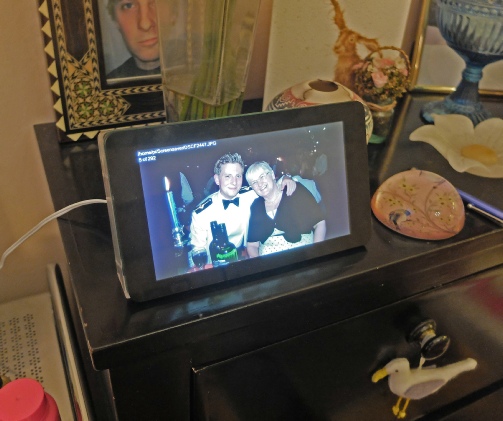
In operation in the living room.
Seagull (not essential to the operation of this unit).

The completed job.
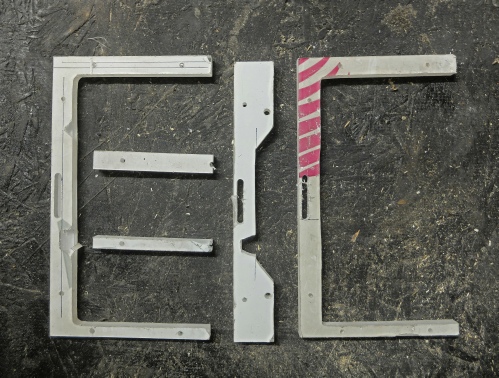
Left are the component parts cut out but not yet smoothed down.
The frame locates against these green Perspex rectangles (which lock the transparent pieces of the stand).
These holes are used to secure the new frame in place.