 Home
Home


Making a pergola
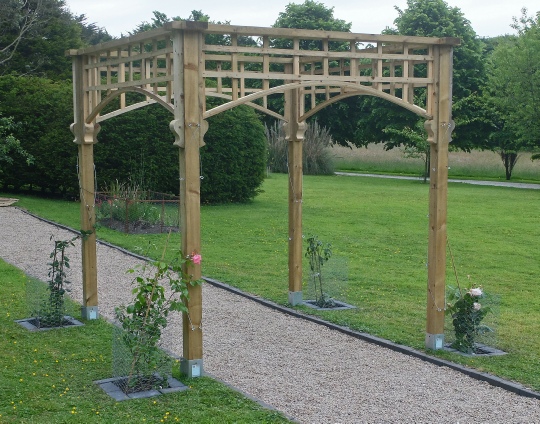
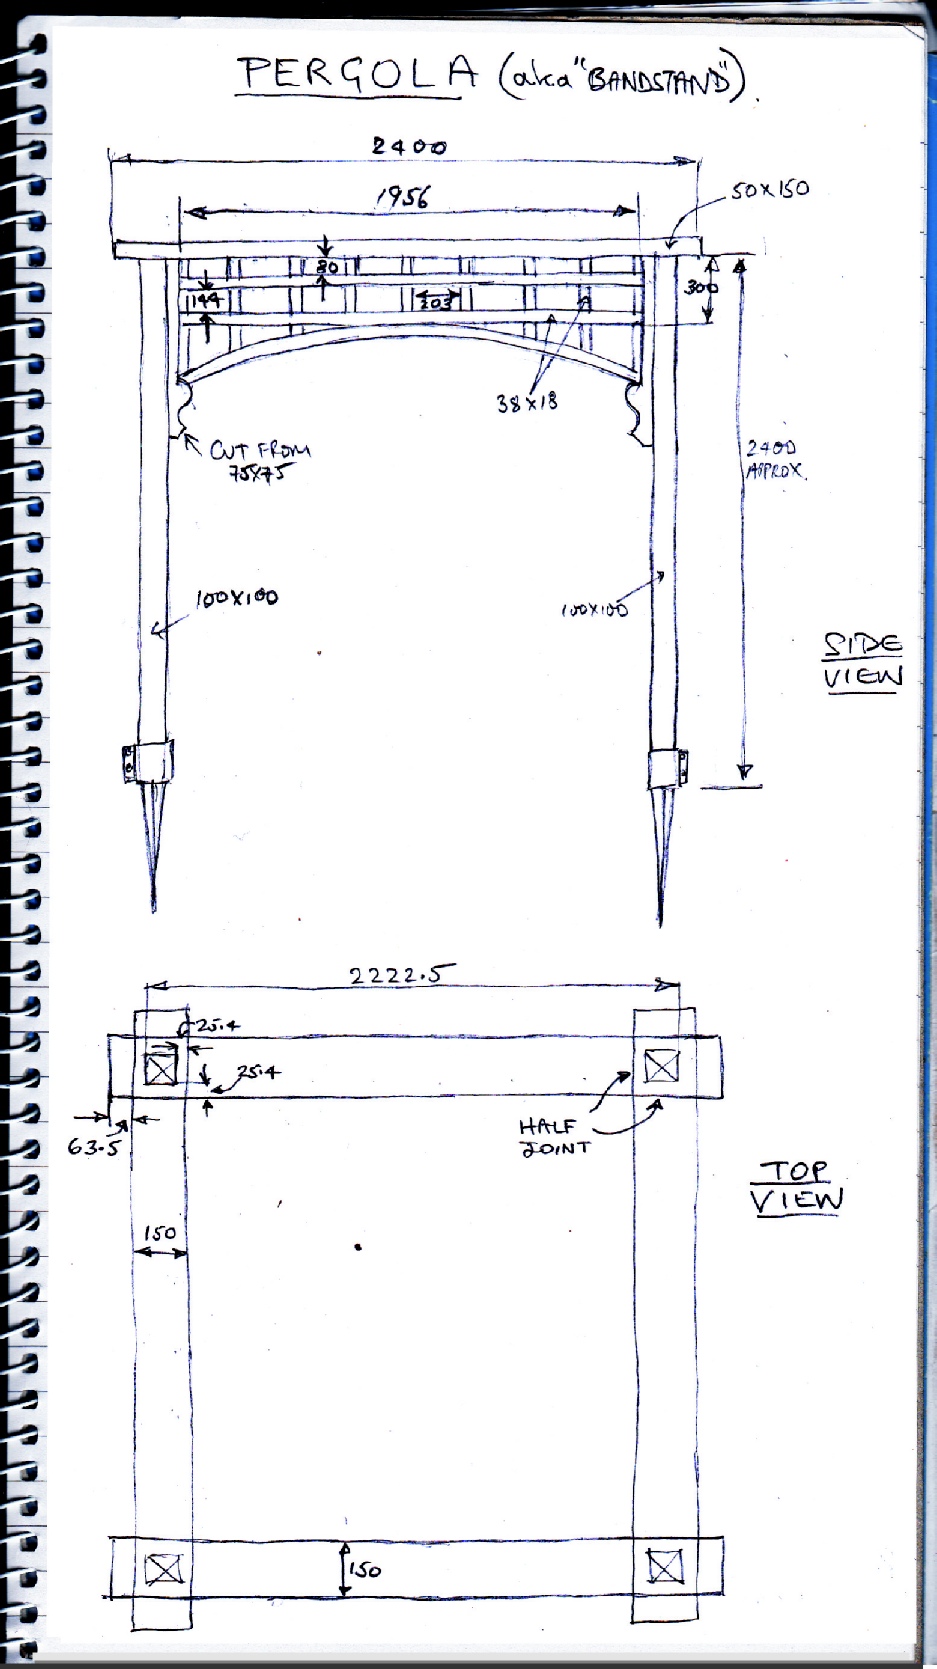
The pergola stands on 100 x 100mm x 2.4M pressure treated timber (adjusted to ensure the top is level). The top is made from 4 pieces of 150 x 50mm x 2.4M timber. The “ears” from which the arch springs is cut from 100 x 100mm stuff.
The arch itself is (dry) laminated from three pieces of timber 38 x 11mm (ripped down from 38 x 25 stuff selected for a lack of knots which will cause the timber to break when it is bent. For the dimensions I was using, the length of each lamination needed to be 2020mm to achieve the curve I wanted.
The trellis pieces were made from 38 x 19mm cut down from 38 x 25 which was the nearest size my timber merchant stocked.
All cut ends and sides should be treated with wood preservative to maintain protection as the pressure treatment does not penetrate very deeply.
Having decided on the dimensions, the first step is to hammer in the Metposts I like to use Metposts as they are quick and easy(ish) -
I start them off by making a narrow hole as deep as possible where the Metpost is going to go using a long cold chisel. I use a spirit level to check the hole is vertical. This will get the Metpost started and shift any stones near the surface. I then put in the Metpost with a short piece of post in the top to provide a surface to hammer. I tap it down about two thirds of its length with a large hammer, constantly readjusting it to vertical as I go. At the two thirds point it has reached the point of no return and I finish it off with a sledge hammer. There is always a little play available in the socket if the Metpost is a few degrees off vertical.
I then drop in the four 100 x 100 posts and start setting them vertical (see next page…)