


Under Construction
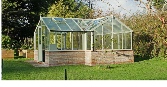
Greenhouse 7
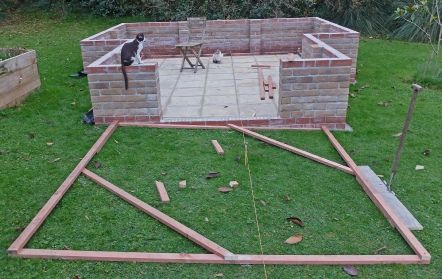
I wanted to lay some paving in front of the greenhouse that would be 5x5 slabs in size. I first made a pattern out of 2x1 screwed together. The outside dimensions were 90X90” which allows for about 1/2” round the perimeter of the slabs.
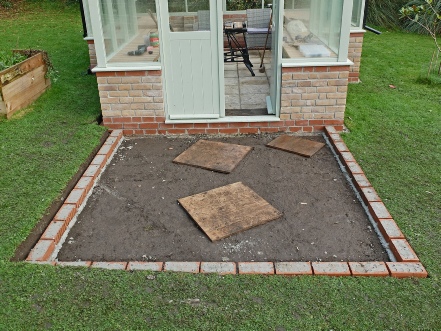
Like the floor of the greenhouse, I am going to put a course of bricks round the perimeter, fill the space with compacted hardcore and sharp sand, dry lay the slabs and finish off with another course of bricks round the edge. I’ll lay the bricks on a little foundation of concrete 6” wide and 3 1/2” deep. To mark this out, I centre the pattern on the greenhouse and use a piece of ply 5” wide laid against the pattern and a half moon cutter to mark the outside of the trench for the concrete.
I then take the pattern away and use a 6” wide piece of ply set to the previous cut to mark the inside of the trench. Thus when the concrete has been laid, I can lay the bricks against the pattern and they will be centred on the concrete.
Next, I strip off the turf and drive in pegs set to the finish height of the concrete using the optical level as previously described. Then I remove soil to make the bottom of the trench 3 1/2” below these pegs.
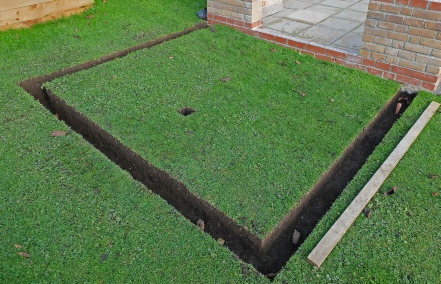

Then it’s a question of filling the trench to the top of the pegs with a little bit of concrete.
More paving!
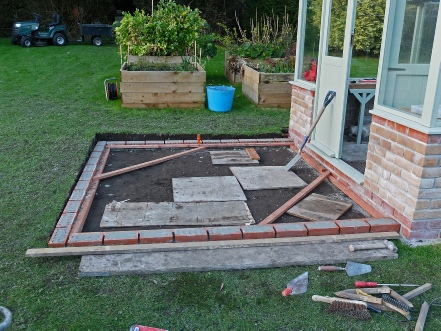
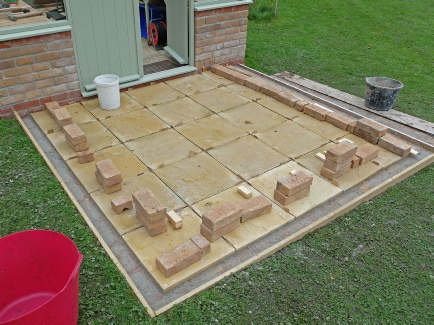
Next, the pattern goes back (pinned in place with a couple of large screwdrivers) and a row of bricks gets laid up to the pattern, on a bed of soft mortar. I have left gaps between the bricks to allow water to drain away. I’ll pack the gaps with sharp sand later. I used a straight piece of wood to check the tops of the bricks were in line. With no wall to be built on these foundations, I was considerably more relaxed with this bit of work than I had been with the previous bricklaying!
Next, I filled the space up to the height of the bricks with 20mm aggregate. I saved money hiring a plate compactor by pounding the aggregate down with the end of a heavy piece of 3X3 inch timber.
Then I shovelled on a layer of sharp sand, ruled it flat by dragging the edge of a board supported by the bricks, and compressed this by half an hour’s foot stamping. I added more sand, stamped again added more sand and ruled it level for the final time.
Then I laid the slabs separated with 6mm pieces of wood.
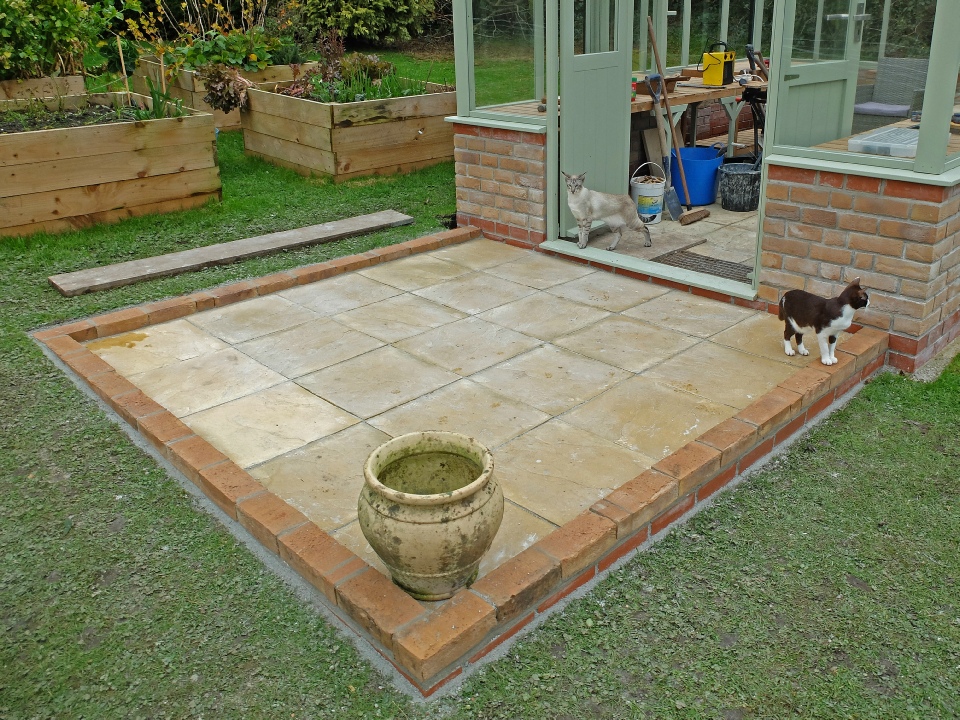
Finally, I laid some of the London stock bricks, frog down, on the original bricks to form a border. I laid the bricks tight up against each other with no mortar between them to aid drainage. I pointed the 13mm or so gap between the bricks and the slabs with mortar. I also put a little mortar in the gaps between the bricks for appearances sake.
Lastly, I removed the spacers and brushed sharp sand into the gaps between the slabs.
The cats seem happy!