Home
Home


Interior light
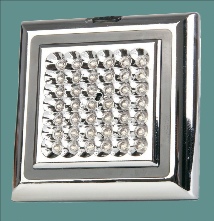
I started off with a rather unpromising looking 42 LED light which can be had for around £8 and is intended for a truck or caravan. They have a chrome plastic bezel which I removed and discarded.
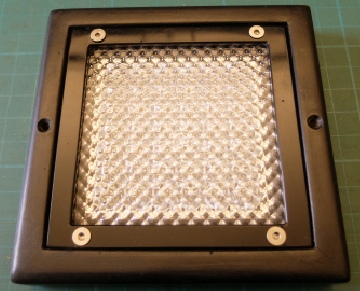
In order to hide the LEDs and make the whole thing a bit more retro, I bought a sheet of prismatic diffuser (again from Ebay).
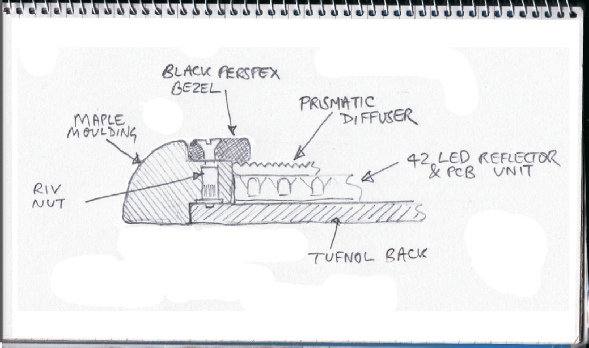
The fitting is made from black Perspex and maple stained with black Indian ink and polished with Halfords black trim wax. The maple is so close grained and takes the polishing so well that it makes a great material to use for bits of trim like these (in my opinion anyway!)
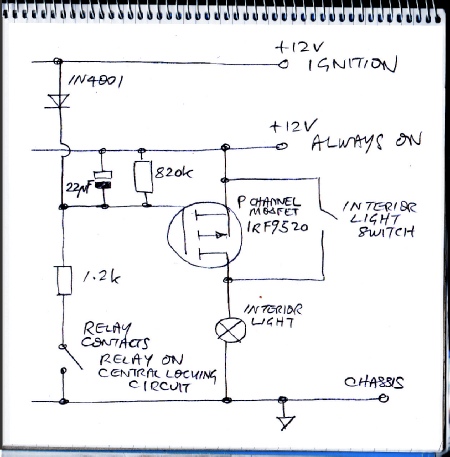
I’ve fitted a small toggle switch underneath and also arranged a connection with the central locking so that the light comes on for about 30 seconds when the doors are opened with the remote control. The light cuts out immediately if the ignition is turned on.
Sheet of prismatic diffuser
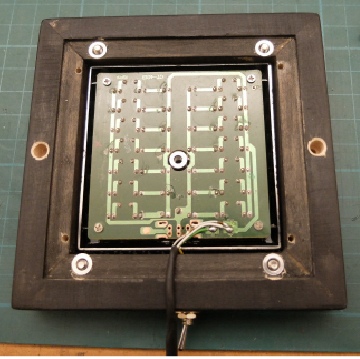
Rear of unit showing the original circuit board for the LEDs.
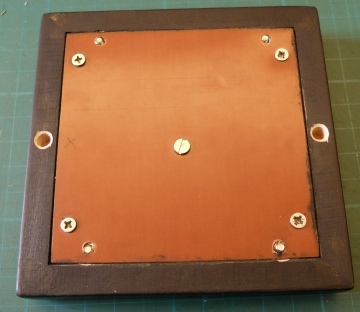
Thin sheet of Tufnol covers the back.
The finished unit.
Construction
The sketch above shows some details of the construction. The rebate will need to be cut out using a router or a planer. The curve on the outside can be planed by hand and finished by sanding after the four pieces needed have been glued together. You can see the pieces mitred together in the view of the back shown in the picture left.
Mitres need to be very accurate if the joint is not to show (although there is a little bit of squeezability in timber that can accommodate small discrepancies if clamping is tight enough.
Probably the easiest way is to cut the mitres a little oversized using a circular saw or hand mitre saw and then sand them on a fine (180 grit, say) disc sander.
To glue them, you will need a mitre clamp as used for picture framing. I mostly use some wooden corners and a webbing strap although there are very cheap band clamps available where everything is built in.
I excavate tiny holes in the mating surfaces of the joints to give the (epoxy) glue something to grip, keeping about 2 mm clear of the edge.
Try not to get any glue on the surface ad it will show when you polish the wood.
To provide a thread for screws, I drill holes which are a tight fit for aluminium riv-
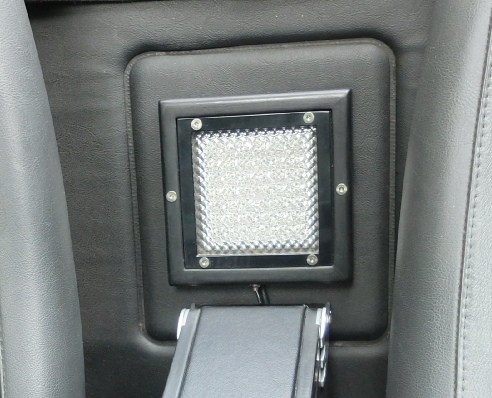
I screwed the unit to the cabin rear trim panel in a position just above the central cubby.
You can see the position of the on off switch
The circuit above turns on the light by means of a relay contact in the central locking system. When the relay opens, the mosfet continues to conduct until the 22 micro Farad capacitor has sufficiently discharged through the 820k resistor. It then gradually fades out. When the ignition is turned on, the capacitor is effectively shorted out and the light turns off immediately.