


Under Construction
Greenhouse 1
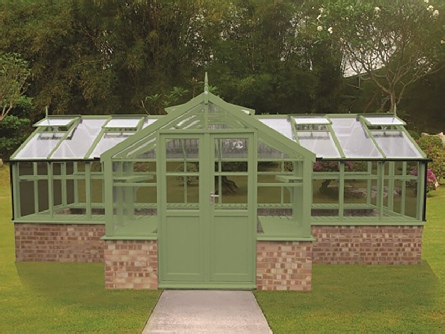
This is what the greenhouse will look like (this picture is borrowed from the Swallow website). You build the wall, they come and erect the woodwork and glass.
I’ve only ever done a smattering of bricklaying so this may be a bit of a challenge! Apart from laying the actual bricks, the big challenge will be laying out the site to the right dimensions, square and level (the site is on a bit of a slope which you don’t particularly notice until you start to try to build things on it).
Disclaimer! It should be noted that when it comes to this sort of thing, I am “making it up as I go along” so although what I am doing seems to work, there may well be much better ways to do the job. Anyway, here goes…
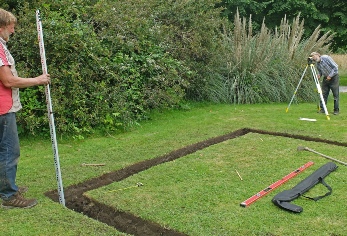
The first thing you need are some tools. I already had shovels, trowels, hammers and cold chisels etc and a cement mixer (which, up to now, I have mainly used for patching concrete paths and setting paving slabs). I had a motley collection of spirit levels which didn’t quite agree with each other and nothing longer than about 600 mm so I bought a set from Screwfix which seemed like a bargain. I also bought a large folding set square and a length of builder’s line. A long piece of 50 x 3 mm aluminium bar acts as a reasonably accurate straight edge.
It seems to me that to set out even a small building, not only do you have to determine whether various points on the surface are level, but you also need to level the bottoms holes and trenches or measure differences in height of things which are some distance apart. A spirit level is not really suited to this and is not in actual fact that accurate anyway. This is a problem if a spirit level is needed to transfer a level over any sort of distance.
The modern answer is a laser level. I have had a £25 version for years. Its accuracy depends on adjusting the thing level on its tripod by eye using a spirit level. This is almost certainly not too accurate and you can’t see where the laser dot is on the target during anything other than a very overcast day!
Self-
Foundations
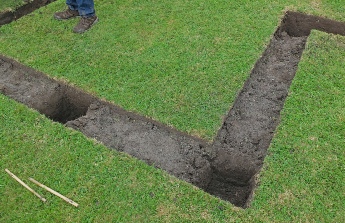
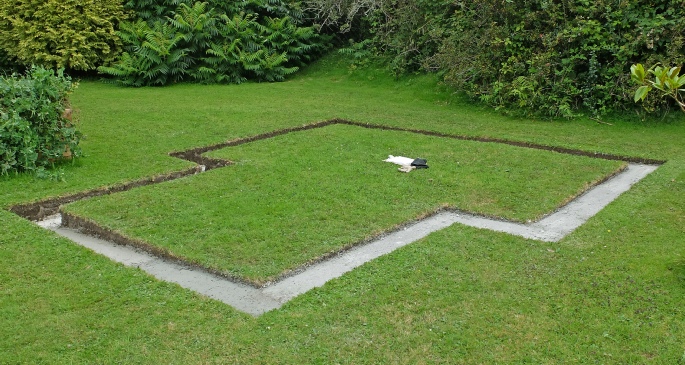
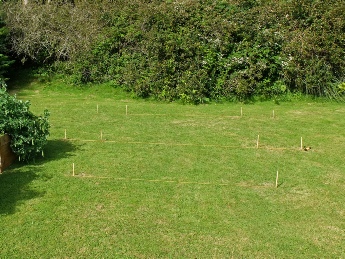
Anyway, the first job was to set out the outside positions of the walls using string and pegs. We then cut the turf 4” outside the line and 8” inside making 12” wide foundations for a 4” wall (with some piers).
We established a reference level with a peg a little under the lowest level of the site. We then dug a series if holes with bottoms 10” below that (The foundations will be 10” deep). We then removed the earth between the holes.
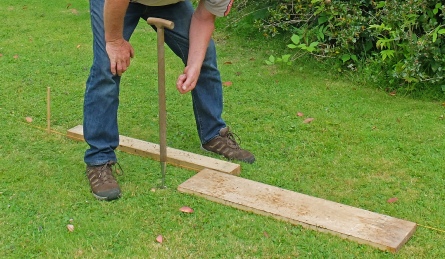
We then tapped in some pegs and used the level to get their tops to the surface level of the foundations. It was then a case of mixing up a fair quantity of concrete, pouring it in and levelling it to the tops of the pegs.
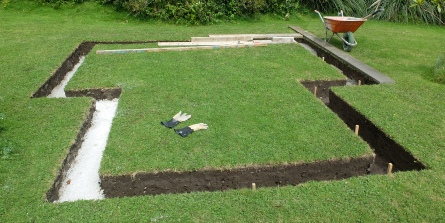
Voila! Next, preparing the floor…

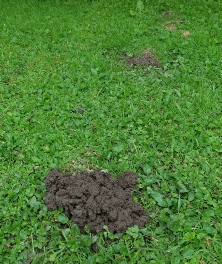
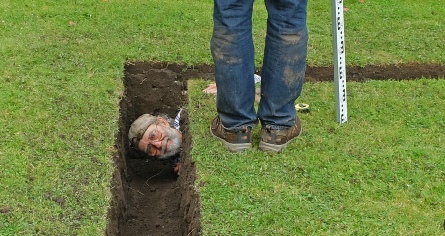
I’m not the only one digging round here!
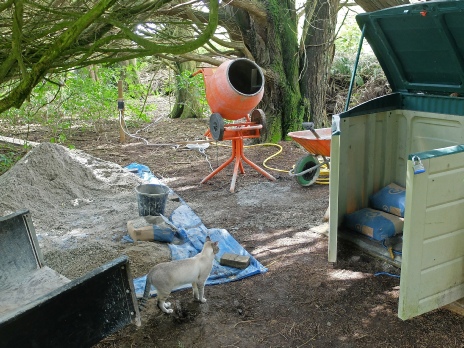
A surprisingly large amount of material goes into building stuff! Since this pic I have needed three more bags and a delivery of slabs. It all has to be moved onto the site.
Mixing up concrete and cement etc makes a right old mess! It includes concrete and mortar remnants, and gravel used to help clean the mixer. Fortunately, I have a space behind a nearby hedge so my mess only concerns the cat (he looks a bit disgusted!)

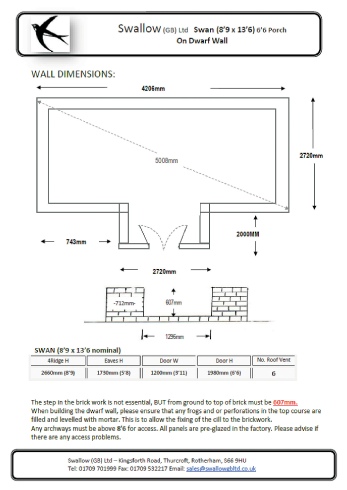
This sketch would not get a pass in GCSE Technical Drawing (I have been a DT teacher for my sins!) But I am sure at the factory, they are working to something better!
Cat -
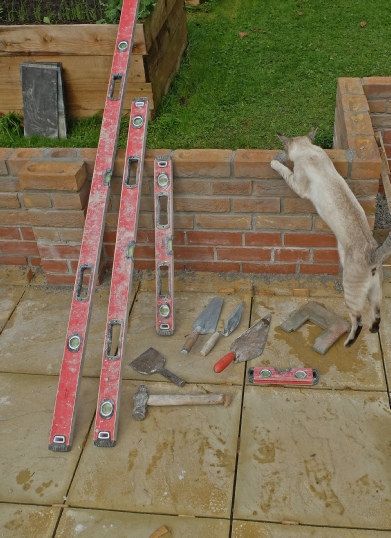
Set of levels, 6’, 4’, 2’ (and a “torpedo”).
Round ended “gauging” trowel. I used this to transfer mortar from the barrow to lay the bed of mortar.
Pointing trowel. Trim off and apply small bits of mortar.
Bricklayer’s trowel. Proper bricklayers use this to lay mortar and bed bricks by tapping with the handle. Just a bit too heavy duty for an amateur with not enough muscles like me!
“Bricky” (helps to get mortar on the ends of the bricks -
Bolster cold chisel. Used to cut bricks and chip off mortar where it’s not wanted. Modern versions have guards for sissies who want to avoid hitting their hands with the hammer! Other sizes of cold chisels are also needed.
Large hammer. This is an old ball-


Some basic tools
Also needed: a string line, Stanley knife, buckets, rough floor cloth, wheel barrow etc etc.
I worried quit a bit over the depth (and width) of foundations to use. Generally, you can use a concrete raft with steel reinforcement which should be stable and can act as a floor, or strip foundations below ground level which requires more brickwork as you start laying bricks from below ground level or trench foundations where you dig a trench and fill it with concrete then start laying bricks. Given my lack of experience in bricklaying, the fewer bricks the better so trench foundations seem to be the ones to go for. Foundations need to be deep enough to bear on stable soil (there are lots of considerations and for a “proper building” guesswork is not enough!) Our soil, I would say, is firm sandy clay. This does move with the water content of the soil and I understand a minimum of one metre would be needed for a building of any substance. However, my greenhouse is a pretty light structure with single skin walls only about 750 mm high so I am guessing 12” wide and 10” deep will do. I hope I am right!
Perhaps some reinforcing rods in the foundations might be a good idea. My worry is rust. Rust expands with a force which no normal material can resist. Concrete provides an alkaline environment for any reinforcement which inhibits rust but the protection must be thick enough to provide protection. (By the way, anything containing chloride salts promotes rapid rusting and it only takes a tiny amount -
(Here is some information about foundations.)
Working area & storage

The YouTube video is a quick run through of how the project went.