


Under Construction
3-
Although I've been making things all my life in metal, wood and plastic, I am new to 3-
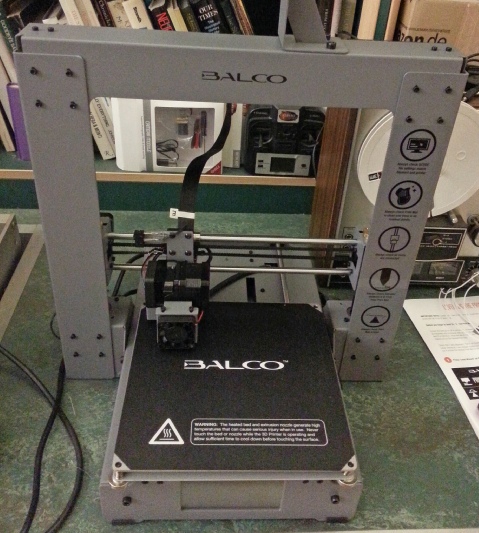
I saw and advert for a 3-
The printer, to my eyes anyway, is satisfyingly industrial looking, apparently made from industry-
Getting it working was quite easy. The most important thing, probably, is to get the extruder nozzel the same distance (0.1mm) away from the print mat initially. This is known as levelling and there is a semi-
It is possible to crash the print carriage into the print mat by incorrect manual control or if there is a residue of extruded plastic slicking out of the print nozzel when you come to use the levelling procedure.
This can cause one of the two stepper motors driving the lead screws which drive the extruder in the z-
I had to remove the nozzle which involves more stripping down of a new piece of kit that I would have liked. The kit includes a 0.4mm drill bit which you can use to clear the nozzle. I was worried that it would never work properly again but to my relief, all was well!
If there is any possibility that one of the motors has stalled, It is important to check that the z-
Introduction
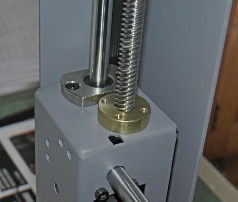
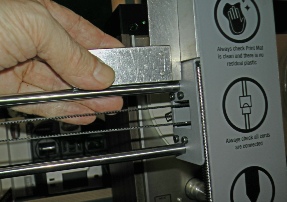
Lead screw (one of two) for movement in the z-

Small try square.
Spacer resting against lead screw.


One thing I can’t quite decide on is the best way to get any filament residue off the extruder nozzle. Sometimes if there is a piece of filament dangling down, it snaps off cleanly when the nozzle is completely cold. Sometimes there is a smear on the nozzle which can only be scraped off when the nozzle is hot. That is fine but if you then want to level the table, a little more filament may ooze through messing up the process.
When I first started, I couldn’t understand why the filament seemed to be caught on the roll under other adjacent bits of filament. It only dawned on me later that when I had been removing a roll from the printer, I was just letting the end go loose where it inevitably got caught under adjacent turns. Always hook the free end of the filament through the holes provided on the roll to prevent this happening! Doh!
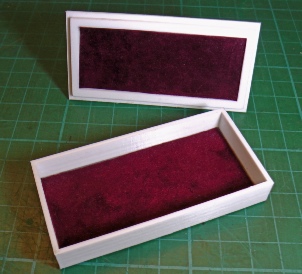
I started off printing a model provided on the SD card included with the machine. I then designed and made a few small rectangular boxes. The most surprising thing for me was the time it takes to print something. For example, five hours for a box 60 mm cube! I learnt that flat surfaces print out quite nicely (but with a definite texture). Curves are not too bad but unsupported undercuts are problematical. Also you have to be ready to break down a complex shape into simpler components which can be glued together. I have only used PLA filament so far and a good glue for this is Tensol No 12. This contains dichloromethane and methyl methacrylate. It seems to weld the plastic together and provide a tiny bit of gap-
The PLA machines quite well but melts if the speed is too high. It can be sanded with wet and dry paper (100 followed by 240 grit, for example). It can be planed with a sharp wood plane and can be drilled and tapped etc.
Once the texture created by the printing process has been sanded out, the PLA can be polished on soft cotton mop (say 150 mm rotating at about 1500 rpm) charged with the polishing/cutting compound known as Tripoli (this is the brown stuff). I suspect heat is produced and the surface flows at a microscopic level. Care should be taken when polishing edges or small details as they may be damaged. After polishing, there will be a rather dirty looking residue of tallow which can be removed with white spirit. Some wax polish finishes off the job.
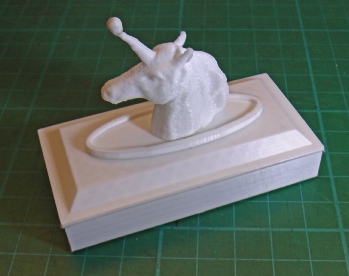

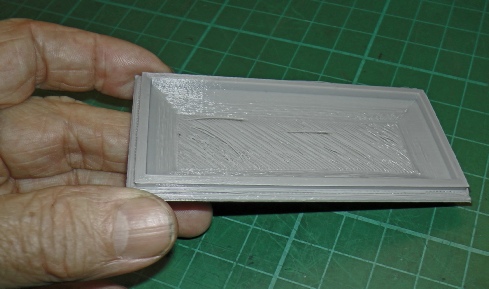
Above, small box with unicorn (provided on the SD card which came with the printer). The recess on the lid had to be printed separately and glued on as I could not obtain a sharp undercut. The picture below shows what happened when I tried to print out the lid all in one go.
I designed the knob (above) as an experiment. It is in three parts: the red base, the grey knurly bit and the red button on top. It was sanded and polished as described above. It could do with more sanding as it is a bit scruffy here and there! (The wavy shape was designed in Corel Draw -
Threads of filament unfused and loose.
This rebate was also a mess and can’t be cleaned up.


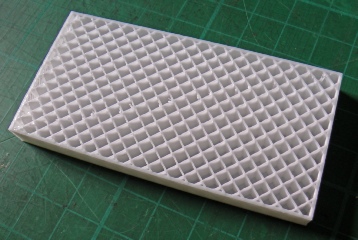
To print a hollow underside or undercut, it is possible to “build support”. I suspect it looks like this (below) leaving a lot of plastic to be cleaned out (with chisels, router etc. etc.).
3-
I tried two different (free) pieces of design software: Design Spark Mechanical, and Free Cad. So far, Design Spark is winning. It involves drawing 2-
I have an ancient copy of Corel Draw9 and 2-
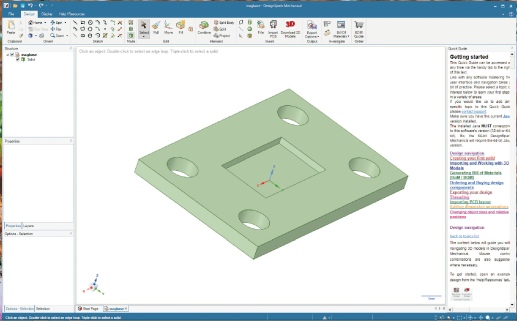
Left is a screen shot of Design Spark in action. Something like this is very quick and easy to design. I haven’t tried any complex shapes involving three-
After completing a design it needs to be exported to a .stl file (you need to choose fine rather than medium here unless rough is what you are shooting for!) This can be opened by slicing software which prepares a file which can be fed to your particular type of printer. My Balco printer comes with Cura software which does this job. The software allows you to rotate the design so that it is the right way up on the printer base plate to get the cleanest printout. (For example, you would want a cylinder with its end on the base plate, not its side.)
You can also scale the design in Cura which can be handy.
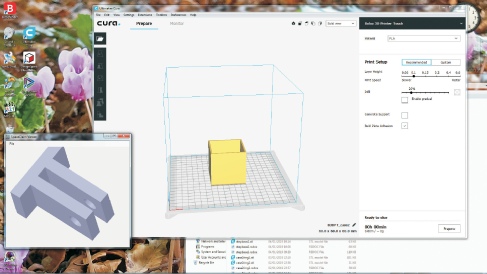
This is Space Claim Viewer. You can drag in .stl files and inspect them from all angles. Handy if you’ve forgotten what name you gave the file you need!
This is a screen shot of Cura in action. It is displayed as a 3-


A great bit of kit for making things which would otherwise be very difficult and time consuming. The (obvious!) downside is that the items printed out are thermo-
Nevertheless, well worth having on your bench at about £299 (2019).
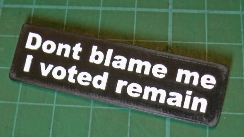
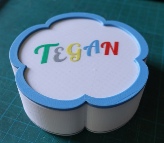
I used Corel Draw to create this text which I extruded in Design Spark (see above). I painted the letters after a bit of sanding and turned the thing into a rather sad badge!)

See here for a simple project to make custom knobs for my TR7 heater.
See here for a more complex project to make a rev counter for my lathe.