


 Home
Home

Under construction
This is a variation on the previous controller. I am trying to work my way towards some sort of definitive design that I can stick to for future controllers. However, I don’t think I’m there yet!
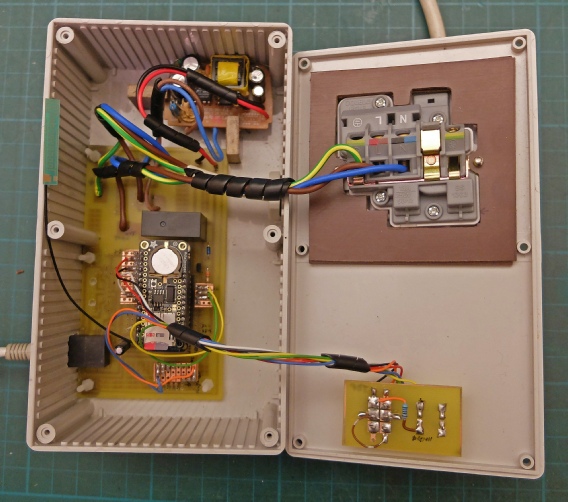
I thought I would try and get everything in one box including the power socket. I wondered about not having any external controls or LEDs etc. and just work from the remote computer control. However, I found that I really needed a) that I needed confirmation that the unit was running, b) that the socket was energised and c) a switch to override the controller and energise the socket. Hence, the two LEDs and the toggle which switches between timed and continuous operation.
There is an I2C connection for a temperature section and provision on the PCB for another socket for expansion (as described here) although I haven’t fitted it this time.
I have also done away with the screw terminal connections and gone for soldering the mains cables to chunky pads on the PCB. This makes for a more reliable connection which could be important as I want to switch 13 Amps so that I can control an electric convector heater as a backup if or when it gets really cold this Winter.
I am a bit irritated that I hven’t been able to make the whole thing a bit smaller. One of the troubles is that mains cables take up quite a bit of space. Also, although the Feather has a small footprint (if a feather can have feet) with the wing plugged in and the depth of the headers etc. it takes up quite a bit of height. I will have to think again about how these controllers can best be packaged.
I worry about not fitting an internal fuse to protect against a fault in the 5 Volt power supply (say 3 Amp) but in the event I am relying on the 13 Amp fuse in the plug.
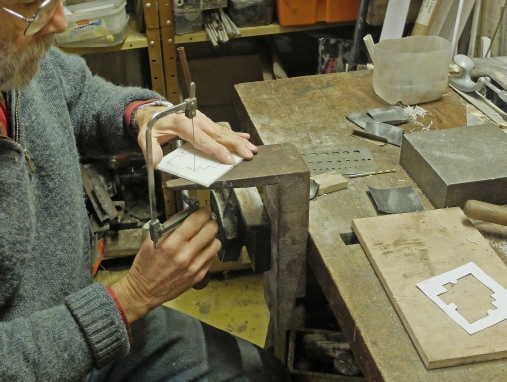
The power socket is designed to be screwed to a standard box and not to the front panel of the box I have chosen for my project (it’s the standard Hammond that I have been using for all these controller projects).
In order to fix it down, I needed a sort of spacer. A paper pattern for this can be seen in the bottom left corner of the picture on the left which shows me cutting it out from a piece of 3 mm Perspex. This proved to be too brittle and snapped while I was tapping one of the fixing holes. I changed over to Tufnol which is easy to cut but, as its name suggests, is much tougher than Perspex.
It’s also thermosetting which means it doesn’t soften with heat (eventually, if it got hot enough it would char rather than melt). This could be important as 13 Amp sockets get hot when under a 13 Amp load. (However, the Hammond box is made from ABS which is a thermoplastic which does soften when hot enough. I will watch it carefully under test!
Another variation on the Feather controller theme
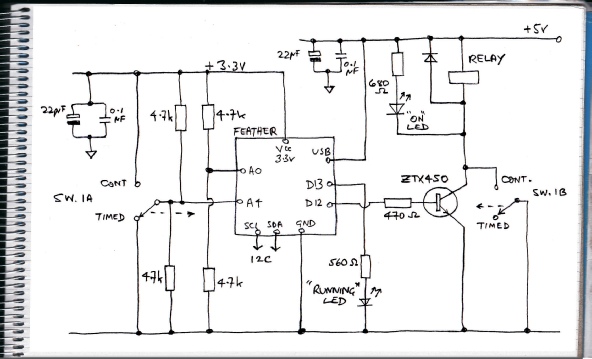
The circuit is similar to the other controllers. Because there is only one circuit being controlled, I am using a transistor to switch the relay rather than a chip with multiple drivers.
Since I am using the same Python software to monitor the unit, I have connected A0 to a potential divider which sets it at about ½ Vcc. The software reads the (non existent) second circuit as “off”.
I have kept the physical controls and LEDs to a minimum. The switch selects “timed” or “continuous” which overrides the timer. I might regret not fitting an “advance” button instead which would override the timer but avoid the load being left on, potentially, for days at a time. I could fit one later.
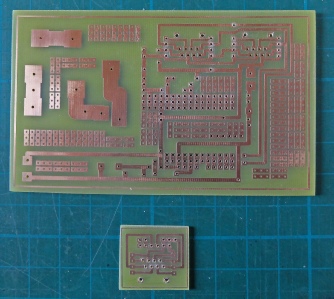
PCB’s for the controller and temperature sensor with the usual spare pads.
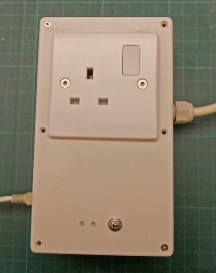
Power socket fitted to the box this time for compactness (?)
